


This post is sponsored by People’s Food Co-op

This series, sponsored by People’s Co-op, will teach you how to ferment your own vegetables, brew kombucha, bake bread with your own sourdough starter, make your own bath bombs, and hand-pull mozzarella.
What is Modern Homesteading?
Historically, homesteading refers to families that took advantage of government programs starting in the 1850’s and beyond to receive free land in exchange for moving to an area that the government was looking to populate.
Over the years, homesteading had become synonymous with self-sustaining practices such as growing your own food, creating your own textiles, and craftwork. In recent years, such practices have made a resurgence and modern homesteading can now be considered a cultural movement.
During quarantine in early 2020, the popularity of modern homesteading practices skyrocketed. The great thing about modern homesteading is that it is no longer associated with where you live, but instead how you live. Modern homesteading allows a family or an individual to make or create the items they consume and use.
The majority of the items listed in this series are available at People’s Food Co-op, including some speciality items that are harder to find!
What is Kombucha Tea?
Simply put, Kombucha is a fermented tea drink. It starts out as a very sugary tea that is then transformed (fermented) with the help of a SCOBY. SCOBY is actually an acronym for Symbiotic Culture of Bacteria and Yeast. It is also sometimes called The Mother. A SCOBY is actually very close cousins with the mother used to make vinegar.
The SCOBY (bacteria and yeast) eat most of the sugar in the tea. What you then get is a refreshing, carbonated, slightly sweet, and tangy beverage. It’s low in calories and sugar and high with probiotics…the type our gut loves!

Some Kombucha Notes
The SCOBY
There is no real way around it, the SCOBY looks bizarre. Almost like something you should not be consuming at all. However, the SCOBY is also wonderful and amazing. It’s a rubbery environment that completely transforms brewed tea into some thing completely different.

As you brew your tea, the SCOBY will grow. You will then be able to share your SCOBY with others who are interested in getting started with brewing their own Kombucha. So in a way, it’s almost like a sourdough starter! The gift that keeps on giving.
Safety
When first starting out with brewing your own Kombucha, it’s easy to feel nervous. The supplies are weird, the scoby is weird, and you’re fearful that you’ll do something wrong to spoil the batch. There are a few things to keep in mind when brewing to ensure you end up with a great batch:
- Start with a clean jar. No need to sterilize.
- Make sure your SCOBY is healthy. A healthy SCOBY can be many variations of brown and usually has brown stringy bits attached to it. An unhealthy SCOBY is yellow, green, has grown a mold or fungus and will smell foul.
- Common sense is a good barometer. Do NOT proceed if your Kombucha is not passing the sniff test. While fermenting, your Kombucha will smell sweet, tangy, and slightly acidic or even a bit like vinegar (in the best sense).
- Keep in mind that Kombucha has been brewed for centuries, in environments much less sterile than our home kitchens.
Is there Alcohol in Kombucha?
The short answer is yes, what you buy in the store and make at home typically has less that 1%. The alcohol content is so low that Kombucha can be sold among other bottled beverages at stores and not in the wine and spirits department. Unless you drink several glasses back to back, you should feel just fine. This information is still helpful to know if you are avoiding alcohol for other reasons.
Kombucha Brewing Supplies and Ingredients
Kombucha does not take a lot of supplies to get started. You most likely already have most of this on hand!
- Stock pot
- 1 gallon glass jar or 2 – 2 quart glass jars (can be found at People’s Food Co-op)
- Tightly woven cloth like a clean tea towel, coffee filters, or paper towels
- Rubberband
- Bottles: 6 – 16 ounce glass bottles (my family uses these bottles with these silicone sleeves for safety) with lids OR swing-top bottles OR plastic bottles
- Scoby and starter tea (People’s Food Co-op carries a very reputable brand of dehydrated scoby. It includes all you need to get going with your scoby and starter tea!)
- 8 Black or Green Tea Bags or a mix of the two totaling 8 (there is so much AMAZING tea to choose from at People’s Food Co-op)
- Sugar (white granulated works best! You can get exactly how much you need at People’s Food Co-op in the bulk bin department)

More Special Notes
- If you would like to add flavor to your kombucha, you can do this after it has gone through it’s first fermentation. (between steps 8 and 9 below) Simply, strain the kombucha, remove the scoby, measure out the starter tea, and then add fruit, spices, fruit juice, honey, or other flavored tea to the kombucha in the large glass jar. My very favorite thing to add to Kombucha is big pieces of fresh ginger…and a LOT of it!
- Cover with the tightly woven cloth and let steep for 1-3 days.
- After you reach the desired taste, strain out the fruit.
- Pro Tip: Store the fruit bits in the fridge and use as a snack or to mix in with yogurt or smoothies!
- The starter tea is an important part of making kombucha. It turns the mixture acidic ensuring that unfriendly bacteria doesn’t make it’s way into your newly batched kombucha during the first few days of fermentation.
- The brewed tea base will start out with a neutral smell when you first add the scoby. As days pass, it will develop a slight vinegar-y smell. Normal!
- If you want to store your scoby, you may do so by creating a Scoby Hotel (no joke). Store your scoby in a glass jar, and add the fresh, sweet tea base to it every 4-6 weeks.
- You can store kombucha starter (the two cups you reserve before batching into bottles) in the fridge for up to 4 weeks.
- If you’re just beginning, use plastic bottles to batch out your finished kombucha. You will be able to feel when they are fully carbonated. This will give you an understanding of how long you will need to let the kombucha carbonate when you switch to swing-top or other glass bottles.
- The scoby may settle at the bottom of the jar, or fall to it’s side, or develop long stringy bits. It will also most likely form a new layer on top of the scoby. ALL NORMAL! When your scoby gets too big, you can divide it and share with friends!
- Every few batches, peel off the bottom (oldest) layer. You can use this to start another batch of kombucha, or share with a friend!
Kombucha
Equipment
- stock pot
- 1 gallon glass jar or 2 - 2 quart glass jars
- tea towel, coffee filters, or paper towel
- rubberband
- small funnel
- swingtop bottles, 6 - 16 ounce glass bottles with lids, or plastic water/soda bottles
Ingredients
- 3 ½ quarts water
- 1 cup sugar white granulated sugar works best
- 8 bags black tea you can experiment with black or green tea or a mix of tea bags. If you are using loose tea, use 2 tbsps.
- 2 cups starter tea You can get this from a friend, a store bought neutral flavored bottle of Kombucha, or often times your Scoby will come packaged with the amount of starter tea you need.
Instructions
- Bring the water to a boil in the stock pot.
- Remove from heat and slowly add in sugar and stir gently until it dissolves.
- Slowly drop in the tea bags and allow to steep until the water has cooled. This will most likely take a few hours.
- Once tea is cool (or strain the loose leaf tea) and add in the 2 cups of starter tea and stir gently to combine.
- Pour the mixture into a clean 1 gallon glass far or 2 - 2 quart glass jars.
- With clean hands, gently add the scoby to the jar (or jars).
- Cover the mouth of the jar(s) with a clean cloth, a few layers of paper towels, or a few coffee filters. Secure tightly with a rubberband.
- Ferment the tea mixture for 7-12 days. Keep the jar with the mixture out of direct sunlight and don't disturb the contents.
- Once the tea reaches your desired taste (you can begin tasting the kombucha around day 7), remove the scoby from the jar with clean hands and set aside.
- Measure out two cups of starter tea for your next batch and set aside.
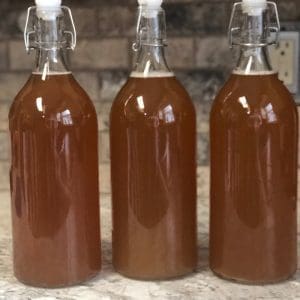
- You may strain the Kombucha at this step if you'd like. Pour the Kombucha into your swingtop bottle, glass bottles, or plastic soda/water bottles leaving 1/2" - 1" of headspace.
- Store the bottles at room temperature out of direct sun and allow the kombucha to carbonate. When the plastic bottles are rock hard, you may put the bottles in the refrigerator to stop the carbonation process.
- Make a fresh batch of Kombucha using your starter tea and scoby.
Notes
- If you would like to add flavor to your kombucha, you can do this after it has gone through it's first fermentation (7-12 days). Simply strain the kombucha, remove the scoby, measure out the starter tea, and then add fruit, spices, fruit juice, honey, or other flavored tea to the kombucha in the large glass jar. Cover with the tightly woven cloth and let steep for 1-3 days.
- The starter tea is an important part of making kombucha. It turns the mixture acidic ensuring that unfriendly bacteria doesn't make it's way into your newly batched kombucha during the first few days of fermentation.
- If you're just beginning, use plastic bottles to batch out your finished kombucha. You will be able to feel when they are fully carbonated. This will give you an understanding of how long you will need to let the kombucha carbonate when you switch to swing-top or other glass bottles.
- The scoby may settle at the bottom of the jar, or fall to it's side, or develop long stringy bits. It will also most likely form a new layer on top of the scoby. ALL NORMAL! When your scoby gets too big, you can divide it and share with friends!